

A React app
A minimal React and Vite app that embeds the
InstallIntegration component, so you can watch a customer connect their account.Three integrations
Pick between HubSpot, Salesforce, and GitHub, or add your own.
Before you start
Setting up the accounts and credentials takes longer than running the app itself. Budget around twenty minutes for these steps the first time. You’ll also need Git and Node.js 18 or later.1
Create an Ampersand project
Sign up for a free Ampersand account and follow the prompts to create a project.
2
Create an API key
In the dashboard, open API keys and create one. Since the key is used by the React app, choose UI Library when asked where you will use it. You will paste it into the app later.
Which key type should I use, and is it safe in the browser?
Which key type should I use, and is it safe in the browser?
Choose UI Library. These keys can only call the endpoints the UI components need, like creating installations. They can’t make write or proxy calls, so they’re fine for trying things out in a frontend. For production, switch to JWT authentication, which is more secure. Keep server keys, which can call every endpoint, on your backend.
3
Create a destination named defaultWebhook
In Destinations, create a webhook destination called
defaultWebhook. If you do not have an endpoint to point it at, play.svix.com gives you a disposable one that shows incoming payloads in the browser, which is ideal for a first run.4
Set up the provider
You can start with any of the three included integrations. Each provider guide walks you through creating an account and an app:
- HubSpot reads and writes contacts and companies, and subscribes to contact changes. Follow the HubSpot provider guide.
- Salesforce reads and writes accounts and contacts. Follow the Salesforce provider guide.
- GitHub reads and writes gists. Follow the GitHub provider guide.
5
Install the CLI
Install the Ampersand CLI and run
amp login to authenticate.Run it
1
Clone and install
2
Deploy an integration
Pick the one you set up:Integration name: This creates a revision of the integration from its
- HubSpot
- Salesforce
- GitHub
hubspotCRMamp.yaml. Nothing syncs yet, because no customer has installed it.3
Point the app at your project
In
src/App.tsx, replace MY-PROJECT-NAME and MY-API-KEY with your project name and API key, and set integration to the name from the step above.4
Start the app
http://localhost:5173 and connect an account. You’ll see a four-step setup: Connect, Select objects, Configure, and Review. These screens show Salesforce: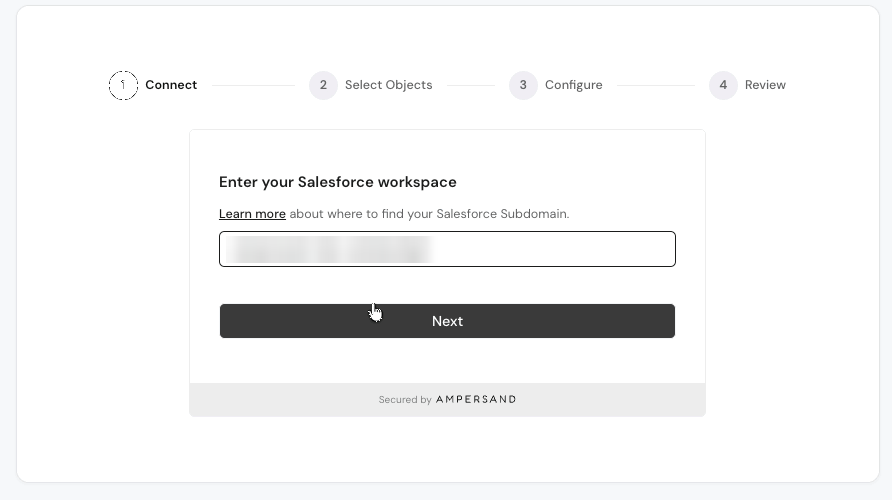
Country here comes from a mapToName in your amp.yaml.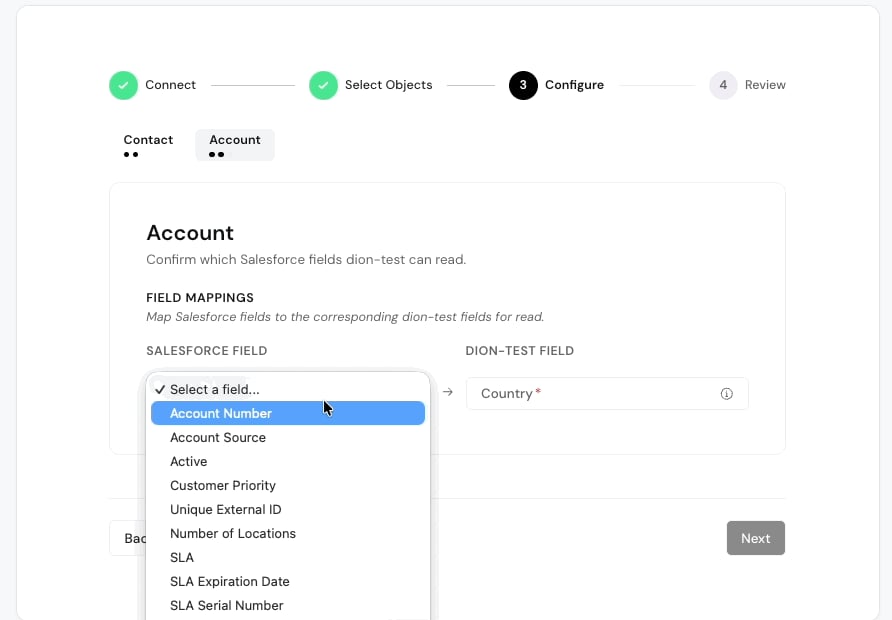
I connected an account, but nothing is happening. What's wrong?
I connected an account, but nothing is happening. What's wrong?
Check that you deployed the integration before connecting, and that the
integration name in App.tsx matches your amp.yaml. Without a deployed integration, connecting creates a connection but not an installation.5
Check that it worked
The starter integrations read existing records first, so results start arriving at your
That’s it! You now have a working integration.
defaultWebhook destination soon after setup. After that, new and updated records keep arriving. If you used play.svix.com, they show up on that page. To see every read, write, and proxy call and whether it succeeded, go to Integrations in the dashboard, open your integration, and select the installation.What does a message look like?
What does a message look like?
Here’s a shortened example:
fields holds the fields you asked for, and mappedFields holds the ones each customer mapped. See webhook messages for every field.What the code does
The whole integration surface is one component.AmpersandProvider holds your project credentials, and InstallIntegration renders the connect and configure flow your customers see:
src/App.tsx
consumerRef and groupRef identify which of your customers is installing; in your app, they come from your user and account records. variant="wizard" turns on the step-by-step setup, which is in beta. See Prebuilt UI components for every prop.
Make it yours
1
Swap the integration
Add a folder under
integrations/ with your own amp.yaml, or one from the samples repository, and deploy it the same way. Then set integration in App.tsx to its name, and make sure its destination exists in the dashboard. See the manifest reference for every field.2
Redeploy after changes
Run
amp deploy again whenever you edit your amp.yaml. You only need one amp.yaml for all your customers, and it can hold multiple integrations.3
Get ready for production
Switch from an API key to JWT authentication, and use a separate Ampersand project for production, with its own provider apps. See Dev and prod environments.
Where to go next
Concepts
Integrations, installations, revisions, and configs.
Actions
Read, write, subscribe, search, and proxy.
Prebuilt UI components
Props, theming, and the other components in the library.